How to install OpenSSL application on Windows Machine
In this blog post, we will see how to install OpenSSL Application for Windows platform users. There are tons of blogs explaining the installation procedure for other platforms like Linux and Mac OS and I don’t find any blog posts explaining clear explanations of the installation procedure for OpenSSL. We are going to see a step by step guide on OpenSSL installation.
How to install OpenSSL complete step by step guide
- You can get the executable file for installation at https://slproweb.com/products/Win32OpenSSL.html
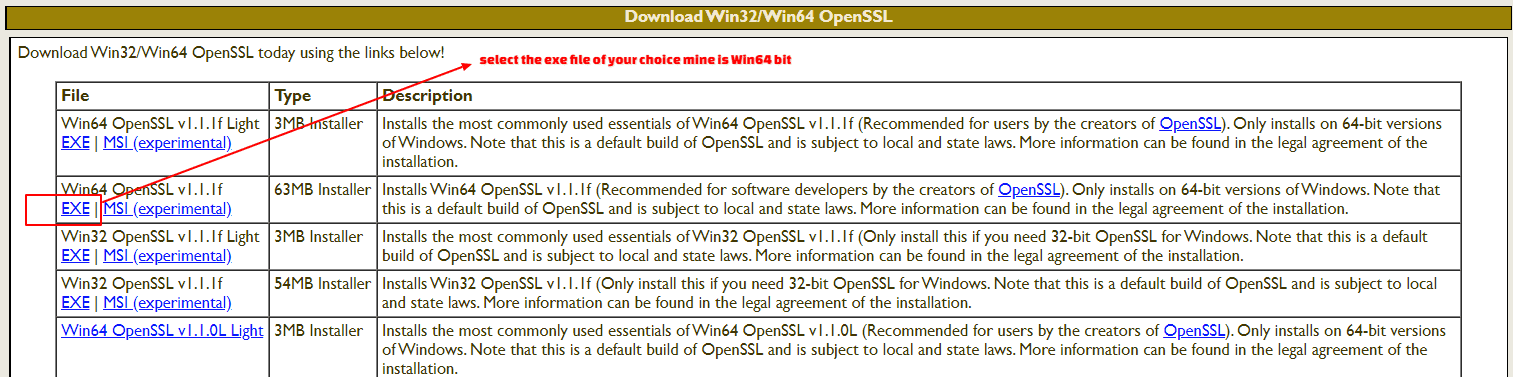
- Go to Download Win32/Win64 OpenSSL section and based on your Operating system download the required EXE file.
- Right-click on the just now downloaded file and click “Run As Administrator”

- Select Licence Agreement click Next
- If you want your installation folder to be at a different place, please select the destination folder of your choice otherwise leave it as it is and click Next.
- Click Next… Next… then Install
- Click Finish to exit the setup
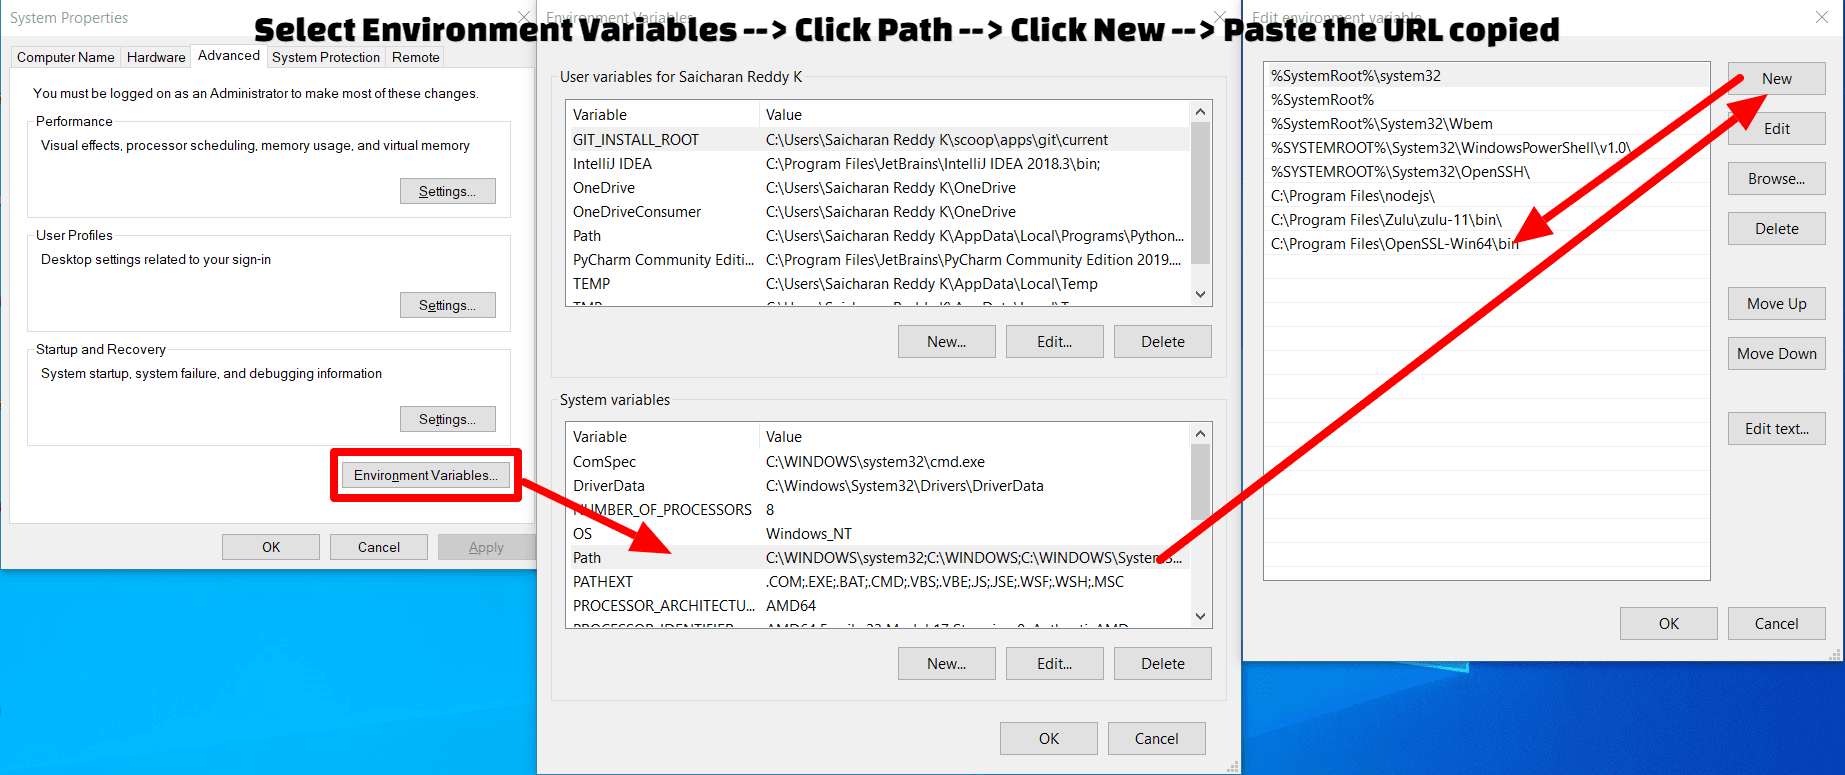
- Go to Control Panel\System and Security\System → Advanced System Settings → Environment variables → Select Path Variable in System Variables → edit → click New → paste the Openssl bin location ( In my case C:\Program Files\OpenSSL-Win64\bin )
- Now your OpenSSL is installed on your machine and ready to use.
- Open Command prompt Win+R enter cmd it will open Command Prompt
- Enter Openssl
- Enter “version”, you can see the version of OpenSSL installed on your machine.

Now OpenSSL is ready and you can start generating the keys. Please let us know if you have any questions in the comments section. Thanks for reading.
How to Install OpenSSL on windows 10 64-bit
Saicharan Reddy K
Hey there,
I am Saicharan working as a Salesforce Support based out of Hyderabad having nearly 5 years of experience in the Information Technology Industry and close to 2 years in Salesforce, Apart from the job I love music and obviously playing cricket. Giving back to the people is what matters most. #Ohana
Cheers !!!
Comments
Leave a Comment